Since today is our last day of class before we go off on Winter Break; I am granting you all a free day in the computer lab! Before you all set off making a project on any of the programs we learned this semester or playing a game, I'd like to ask you for your thoughts about the class.
Please fill out the survey in the link below:
Thank you for all your hard work and enthusiasm this semester! Have a happy and safe Winter Break!
Tuesday, December 14, 2010
Wednesday, December 8, 2010
Create a Project with Sketch-Up, Scratch, or Flash OR Stykz
Today you will have the freedom to create a project with any of the programs that we learned this past semester. Here are some project ideas:
Sketch-Up
Scratch
Flash
Stykz is a stick figure animation program that is really easy to use. You start with a pre-made stick figure and start creating a cartoon. Go to http://www.stykz.net/ to download the program.
Or any other appropriate project you dream up!
Sketch-Up
- create a holiday village set in any place you like: the North Pole, Africa, Italy, New York
- build a robot
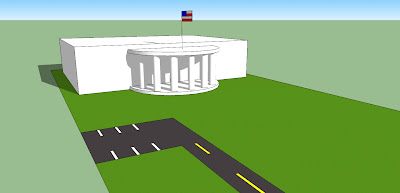
- create a replica of a monument or building: make it to scale
Scratch
- make an animated "talking" holiday card
- create a holiday-themed "Packman" game
Flash
- make your own holiday cartoon
Stykz is a stick figure animation program that is really easy to use. You start with a pre-made stick figure and start creating a cartoon. Go to http://www.stykz.net/ to download the program.
Or any other appropriate project you dream up!
Wednesday, December 1, 2010
Animation with Flash 8
Adobe Flash or Flash is a program that we will use to create animation. You can also use flash to create games, movies, and even web applications but for the time we have we will just stick to animation.
Flash uses symbols, which is the name of an object created or used in Flash. There are 3 types of symbols:
Flash uses symbols, which is the name of an object created or used in Flash. There are 3 types of symbols:
- Graphics: images that stay in place
- Buttons: if you place a button symbol in your animation, people can click on it to start the movie, stop it, or other commands you give it
- Movie clips: Flash movie with its own timeline that you can place inside your movie
Tuesday, November 16, 2010
Learning Computer Programming: Pacman Game!
Today is the last day that we will be working on SCRATCH so make it count! You will be creating your very own Pacman game. You will learn how to:
Follow along with Ms. Hernandez as she goes through the following presentation:
*from Using Scratch for programming and control
The handout you receive today will give you instructions on how to begin creating your game. Use the Packman planning sheet to help you design your game!
If you have a Scratch account and would like to share your game on the blog so that others can play it, write a comment for this post and paste the your Scratch name in the comment.
- design a maze background
- get "prizes" to disappear
- score with prizes
- get the prize to repeat again
Follow along with Ms. Hernandez as she goes through the following presentation:
*from Using Scratch for programming and control
The handout you receive today will give you instructions on how to begin creating your game. Use the Packman planning sheet to help you design your game!
If you have a Scratch account and would like to share your game on the blog so that others can play it, write a comment for this post and paste the your Scratch name in the comment.
Wednesday, November 3, 2010
Learning Computer Programming: Exploring and Connecting on the Scratch Website
Next week, you will create your own Pacman game and in the future you will be creating your very own games on Scratch. Kids your age all over the world are using Scratch to create games or even animated movies and share their projects on the Scratch website. For today you will explore the Scratch website to get ideas for games you would like to create. Take a look at the Featured Projects and to get inspired.
If you are ambitious, you could even download these projects and see the scripts that their authors used. In order to download projects, you must have a Scratch account. First, read the Terms of Use and then Sign Up for a free Scratch account.
The following gallery are projects that our very own Peter created: http://scratch.mit.edu/users/PW132 Take a moment to look at his projects and if you have any comments about Scratch or links to any of your favorite projects, write a comment to this post.
Wednesday, October 27, 2010
Learning Computer Programming: Countdowns, Hits, and Sound!
Today you will learn how to create more scripts that will help you create your own video game. If you are finished with the Clock Project and Ball Game, then move on to the Dog and Cat Game worksheet, which you can get from Ms. Hernandez.
Wednesday, October 20, 2010
Learning Computer Programming: Backgrounds, Sprites , Interactivity
Today, you will learn how to manipulate the backgrounds and "sprites" in Scratch. After listening to Ms. Hernandez's instructions, read how to do the Clock project.
The first step to completing the Clock is to download an image of a clock. Ms. Hernandez will show you how to find this image on your computer and import it into Scratch.
Once you are finished with the Clock, then you can move on to the Ball Game where you will learn how to make your sprites interact. Learning how sprites interact is the first step in learning how to create games!
Wednesday, October 13, 2010
Learning Computer Programming: Scratch Basics
Today we will be exploring basic computer programming with a language called Scratch.
Take a look at this to help you understand what is computer programming and Scrach.
http://www.teachnet-uk.org.uk/2007%20Projects/ICT-Scratch/Scratch/index.html
Some of you are familiar with Scratch, but for many of you this is all brand new. For those of you who are familiar with Scratch, help your classmates out by listening to the presentation or helping Ms. Hernandez explain things if she asks. As you listen to the presentations on how to get through Scratch, take notice of the terms you will learn today:
program (an organized list of instructions that causes the computer/[for this class, a Sprite] to do something)
script (a simple movement program)
Forever
Costume
Sprite
What are the definitions of Forever, Costume, and Sprite in Scratch? Put your answer in the comments below.
After listening to the presentation, you will explore creating a script so that the Scratch Cat will move. This is just beginning of your exploration of the possibilities with Scratch!
Tuesday, October 5, 2010
3-D Modeling with Google SketchUp: Finishing Touches and Dream Architecture
Today you are going to put the finishing touches on your project, save your project as a 2D image and share it with me. After collecting everyone’s Google SketchUp pictures, Ms. Hernandez will put them in a slideshow and share it with the class next week.
Add these finishing touches to your final project:
We put SHADOWS into our Google SketchUp model in order to make our model look more realistic. It also looks very cool! Another reason why we put SHADOWS is to see how the sun shines on what we have designed. If we were going to actually build our designs in real-life, we need to know what sort of shadows our building casts. This would help us with, for example, our placement of a pool in our backyard. Using SHADOWS helps us see the sunny and shady parts of our backyard.
To add SHADOWS to your SketchUp model, follow these instructions:

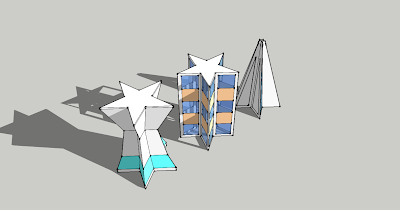
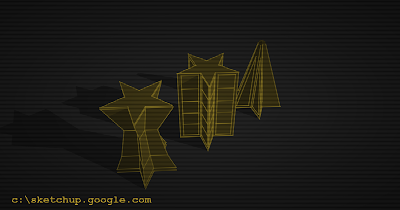
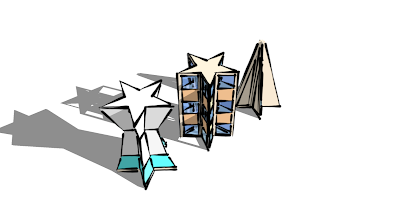
If you would like to highlight the complexity, beauty or coolness of the design of your building, STYLES is a fun way draw attention to your design. Make sure you choose a style that focuses on your design and not on the unique style. Meaning, I want people to say, “Hey, that building looking really cool!” instead of “Hey, the style of that building looks so cool!” Take a look at the following pictures to see what I mean.

 Which one makes you look at my building? Which one makes you get lost in its style? Keep this in mind when you are styling your models.
To apply STYLES to your Sketchup model, follow these instructions:
1. Click on Windows in the top menu and select Styles. This will open the Styles box.
2. Click on the Select tab to make sure that what you choose will be applied to your model.
3. Choose a styles collection from the Styles Collection drop-down list. Click on the upside-down triangle to see all the different styles: Assorted Styles, Sketchy Edges, Straight Lines, etc.
4. Choose a style in the Styles window to apply it to your model.
TA DA! Now your building’s stylin’.
Once you are satisfied with your final project, you need to save it as a 2D image. First , use Orbit or Pan to choose how your model will look in your picture.
Once you are ready to take a picture, follow these steps:
1. Go to File --> Export. Click on 2D Graphic…
2. Type in your first and last name as the File Name.
3. Choose the Export Type as JPEG Image.
4. Choose the correct folder to place this file.
5. Click on Export.
If you have an email address and know how to attach files, send the picture of your Google SketchUp model to ms.hernandez01@gmail.com.
If you are finished with all these tasks by the end of class, take a Round Tower or Factory handout from Ms. Hernandez and work on this project on SketchUp until the period ends.
Add these finishing touches to your final project:
SHADOWS and STYLES
We put SHADOWS into our Google SketchUp model in order to make our model look more realistic. It also looks very cool! Another reason why we put SHADOWS is to see how the sun shines on what we have designed. If we were going to actually build our designs in real-life, we need to know what sort of shadows our building casts. This would help us with, for example, our placement of a pool in our backyard. Using SHADOWS helps us see the sunny and shady parts of our backyard.
To add SHADOWS to your SketchUp model, follow these instructions:
- Click on Windows in the top menu and select Shadows. This will display the Shadow Settings box.
- At the top of the box, click on the Display Shadows check box.
- Move the Time Sliders back and forth to choose the Date and/or Time when the sun the shines and watch the shadows change! Choose a Date or Time.

TA DA! You now have SHADOWS in your model.
If you would like to highlight the complexity, beauty or coolness of the design of your building, STYLES is a fun way draw attention to your design. Make sure you choose a style that focuses on your design and not on the unique style. Meaning, I want people to say, “Hey, that building looking really cool!” instead of “Hey, the style of that building looks so cool!” Take a look at the following pictures to see what I mean.

 Which one makes you look at my building? Which one makes you get lost in its style? Keep this in mind when you are styling your models.
To apply STYLES to your Sketchup model, follow these instructions:
1. Click on Windows in the top menu and select Styles. This will open the Styles box.
2. Click on the Select tab to make sure that what you choose will be applied to your model.
3. Choose a styles collection from the Styles Collection drop-down list. Click on the upside-down triangle to see all the different styles: Assorted Styles, Sketchy Edges, Straight Lines, etc.
4. Choose a style in the Styles window to apply it to your model.
TA DA! Now your building’s stylin’.
Once you are satisfied with your final project, you need to save it as a 2D image. First , use Orbit or Pan to choose how your model will look in your picture.
Once you are ready to take a picture, follow these steps:
1. Go to File --> Export. Click on 2D Graphic…
2. Type in your first and last name as the File Name.
3. Choose the Export Type as JPEG Image.
4. Choose the correct folder to place this file.
5. Click on Export.
If you have an email address and know how to attach files, send the picture of your Google SketchUp model to ms.hernandez01@gmail.com.
If you are finished with all these tasks by the end of class, take a Round Tower or Factory handout from Ms. Hernandez and work on this project on SketchUp until the period ends.
Tuesday, September 28, 2010
3-D Modeling with Google SketchUp: My Dream Room
Spend 10 minutes developing your typing skills at FreeTypingGame.net!
Wait for Ms. Hernandez's instructions before you get on to SketchUp.
Last class, you were tasked with creating a wacky village of houses. Today, you may choose to continue working on your village or create today's project. If you are not working on the 5-house village, but a project of your own design, fill out this form to describe your design to Ms. Hernandez. Only those who have completed and submitted this form with their name can create projects outside of today's assigned Google SketchUp activities.
*TODAY'S ASSIGNMENT - My Dream Room*
Create your "dream" room with Google SketchUp. Follow the worksheet to learn how to create "Walls and Windows." Your room should begin to look like this:

Next, learn how to create a dresser and a bookcase and put them in your room. After placing these pieces of furniture in your room, you can start to decorate. Use Google 3D Warehouse to search for beds, computers, or any other piece of furniture you would like to include in your dream room.
Wait for Ms. Hernandez's instructions before you get on to SketchUp.
Last class, you were tasked with creating a wacky village of houses. Today, you may choose to continue working on your village or create today's project. If you are not working on the 5-house village, but a project of your own design, fill out this form to describe your design to Ms. Hernandez. Only those who have completed and submitted this form with their name can create projects outside of today's assigned Google SketchUp activities.
*TODAY'S ASSIGNMENT - My Dream Room*
Create your "dream" room with Google SketchUp. Follow the worksheet to learn how to create "Walls and Windows." Your room should begin to look like this:
Next, learn how to create a dresser and a bookcase and put them in your room. After placing these pieces of furniture in your room, you can start to decorate. Use Google 3D Warehouse to search for beds, computers, or any other piece of furniture you would like to include in your dream room.
Tuesday, September 21, 2010
3-D Modeling with Google SketchUp: The Basics

Google SketchUp is a free sketching tool that you can download at http://sketchup.google.com
You can use SketchUp to sketch designs for 3D models of houses, buildings, cities, cars, amusement parks--practically anything that you can imagine. Today we are going to get to know the basics of SketchUp by building a painted house with windows, a rooftop, and a chimney.
Use the worksheets from Ms. Hernandez to help you get started. Once you have sketched your first house, show Ms. Hernandez and begin working on today's assignment.
*TODAY'S ASSIGNMENT- My Neighborhood:
Google SketchUp Basics*
Google SketchUp Basics*
1. Sketch a "Box with Windows", following the instructions in your worksheet.
2. "Add a Roof" following the instructions in your worksheet.
3. Paint the walls and add coloring by following the instructions in your worksheet.
4. Use what you know to create a village or a neighborhood of 4 or 5 houses. Unleash your imagination and make your houses as wacky as you wish! Create your village or neighborhood of houses and save your project in order to share it with your classmates next week.
Wednesday, September 8, 2010
Welcome to the Wonderful World of Media Technology!
Hi, I'm Ms. Hernandez and welcome to the wonderful world of media technology! This is the course blog for King Visionaries Fall 2010! This blog will serve as our collaborative space to consider, share, and develop all of the ideas and skills we will learn in this class. Let's take a look to see how we will use this blog:
Today we are going to consider this question: What is CREATIVITY? Let's watch this video on creativity.
What is creativity? How can we be creative in today's world? Answer these questions by posting a comment below.
For the remainder of today you are going to create a GLOGSTER like the one below:
A glogster is like a poster that you create online. Create your glogster! Use these instructions:
1. Choose 5 words to describe yourself.
2. Make sure you include what you think creativity is and how you are creative in your life.
3. Any images or other artwork that represents who you are.
Subscribe to:
Comments (Atom)

